How to Save the Custom Color of a Note Created in Preview So You Can Use It Again
Getting started with Mindomo
Creating mind maps
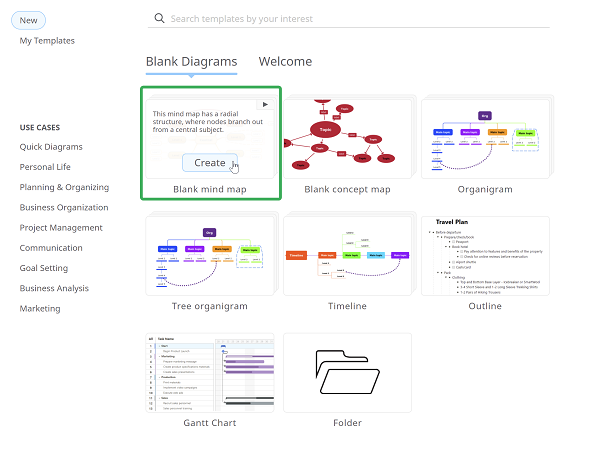
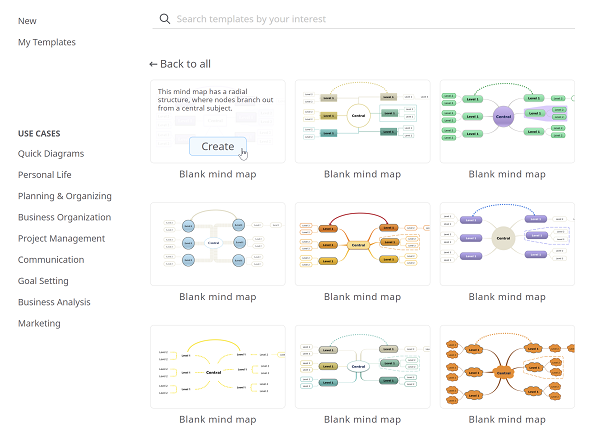
Click on the "Create" button on the height-left corner of your Dashboard. You'll be presented with a panel from where you tin choose to create mind maps, concept maps, folders etc., as well equally cull from several mind map templates.
Click on the "Create" button from "Blank heed map" to create a mind map from scratch.
Click on the arrow from the correct to select the theme of the heed map before creating it.
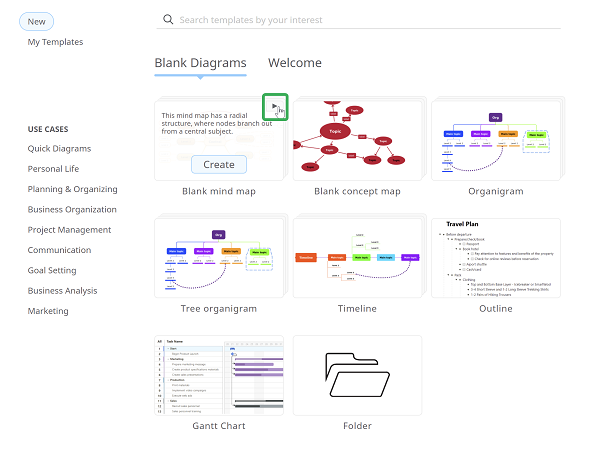
You lot will see all the themes available: the ones created by you and the predefined themes from Mindomo.
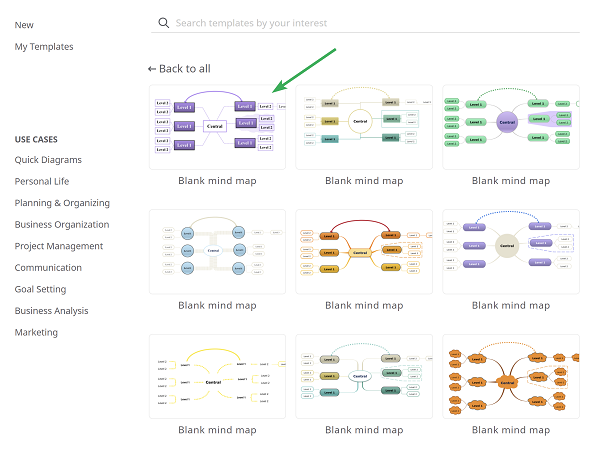
Choose a theme and click on "Create" to outset working on the mind map.
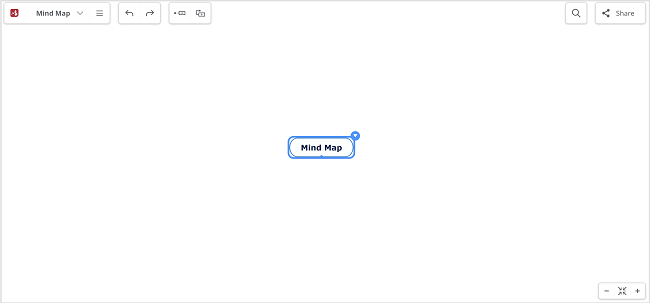
After creating the listen map yous'll exist presented with Mindomo's tidy and easy to use interface.
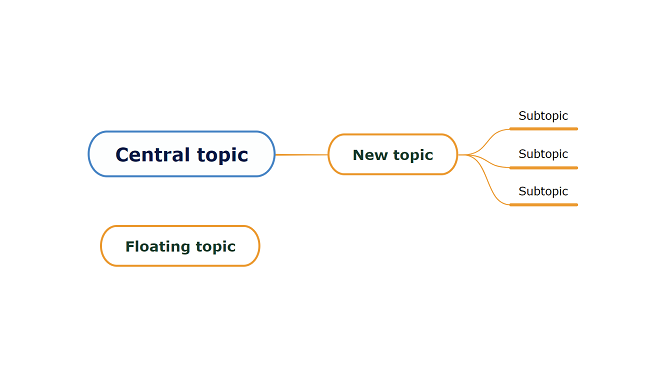
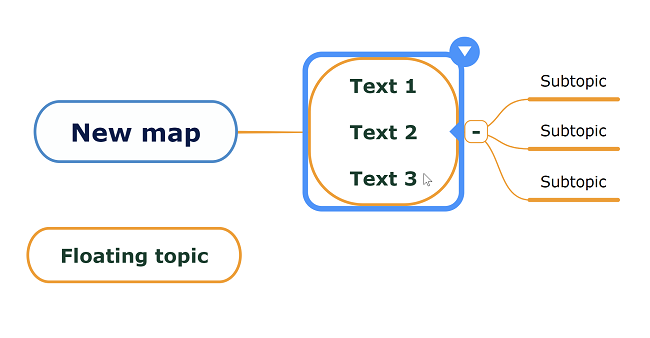
Topic types
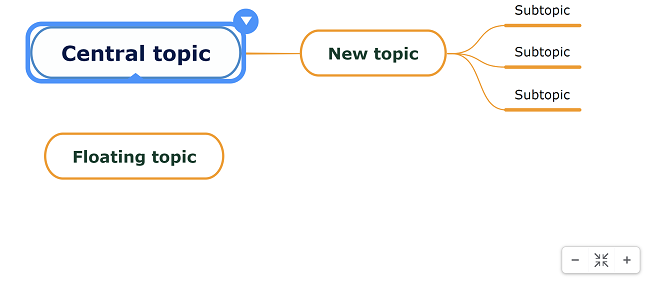
At that place are four topic types:
- central topic
- chief topic
- subtopic
-
floating topic
Naming topics
-
To proper name a topic, click on the topic to select it. The topic shape volition plough blue. Click again to have the text in the topic highlighted in blue. Now y'all tin can type in the words.
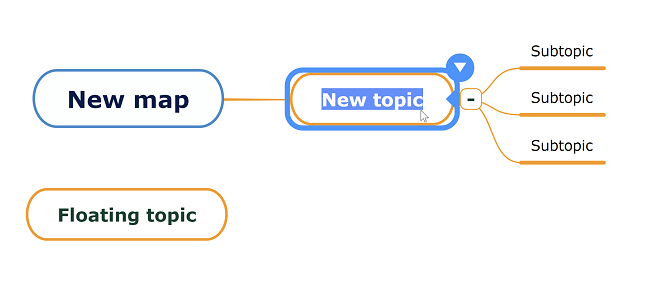
-
To insert a new text line into a topic, place the mouse cursor at the finish of the electric current line, agree the SHIFT key, and and so press the ENTER key.
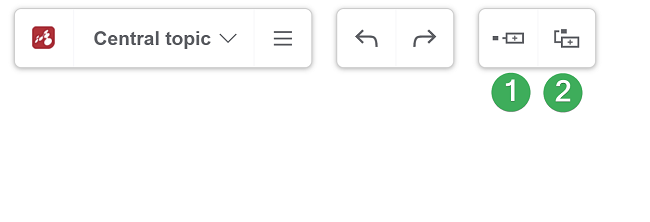
Creating a topic or subtopic
-
Use the Subtopic (1) or Topic (2) buttons on the Map's top card.
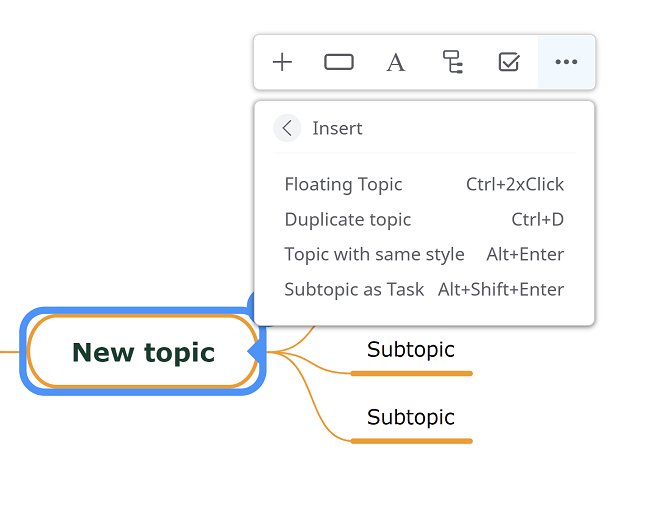
More options
-
Click on the arrow icon in the elevation correct corner of the central topic, then click on the final icon from the context carte du jour and cull "Insert". Hither you have the pick to create a "Floating topic", to "Indistinguishable topic", to create a "Topic with same style" or a "Subtopic as Chore".
-
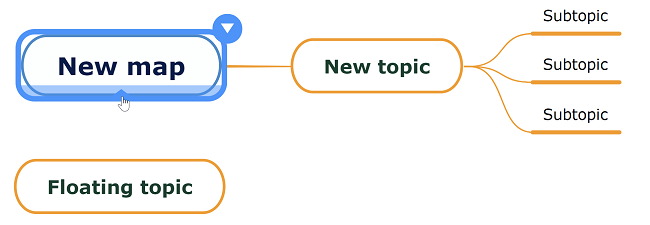
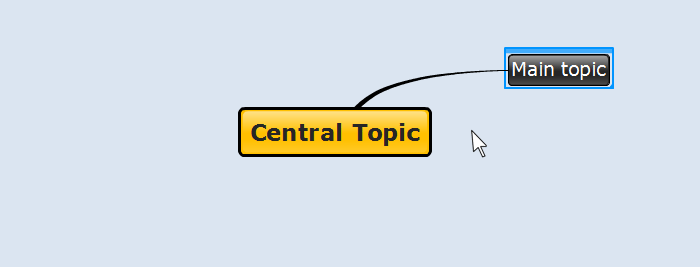
Apply the keyboard shortcut for a quicker topic creation: keep the mouse cursor in the central topic and press the ENTER central.
-
Hover your mouse over a topic, click on the triangle which appears within and elevate to insert a new topic.
-
To delete a topic, click on the arrow icon in the peak right corner of the topic, then click on the final icon from the context carte and cull "Delete". You tin also delete the topic by tapping the "Delete" cardinal from the keyboard.
Repositioning a topic
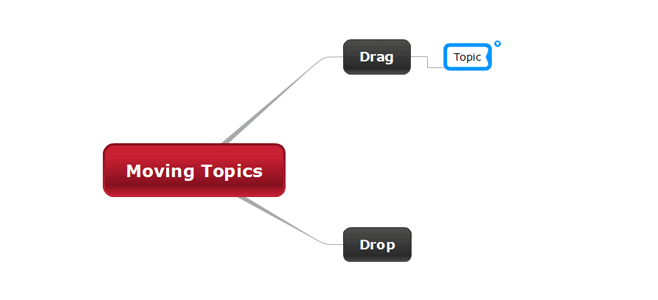
Elevate-and-drop your topics to reposition them on the screen or motility them to other topics.
Now that you've created your starting time map, larn how to Save and Share your mind map, or Open i of the many mind maps created by other Mindomo users.
Navigating
Zoom
-
Use the "-" and "+" buttons in the bottom right corner of the map to change the zoom level.
-
Another way is using the mouse gyre to accommodate the zoom level.
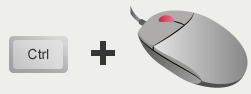
To zoom in and out simply past using the keyboard, printing the "+" and "-" keys while pressing the CTRL key.

To pan with the mouse click and elevate the heed map canvas.
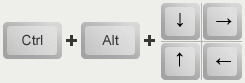
To pan by using the keyboard, printing CTRL + ALT while pressing the pointer keys (upwards, down, left, correct).
Opening mind maps
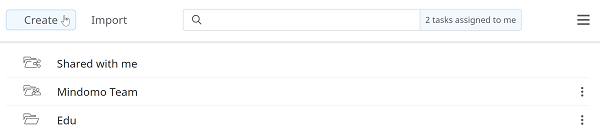
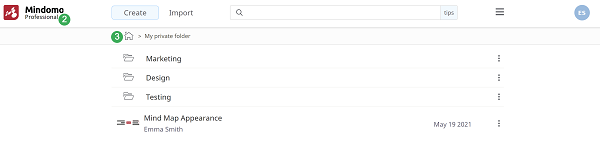
Mindomo Dashboard
The Dashboard allows yous to access your maps, folders, projects, and/or assignments. Merely click on the map (1) to access information technology.
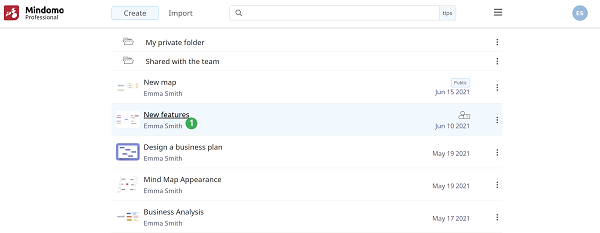
If you've accessed a binder and you desire to return to the Dashboard, click on the Mindomo logo (ii) or the Home icon (3).
Saving heed maps
Saving your listen map
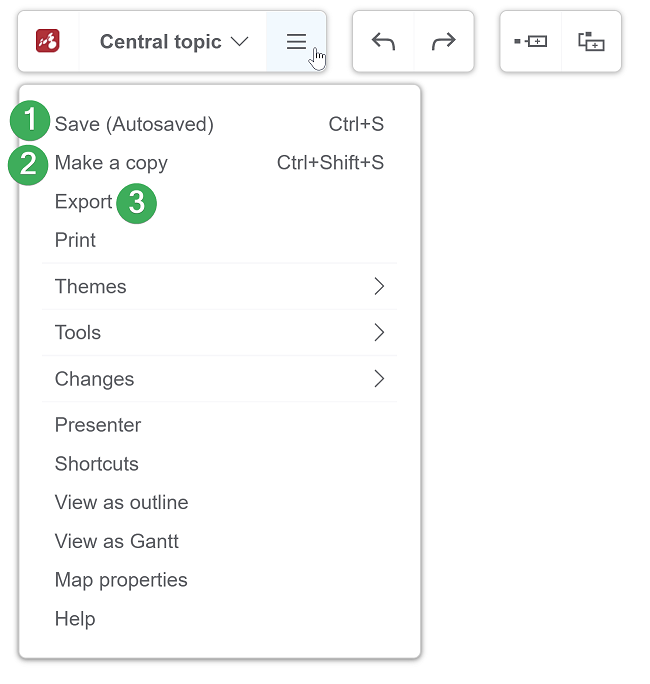
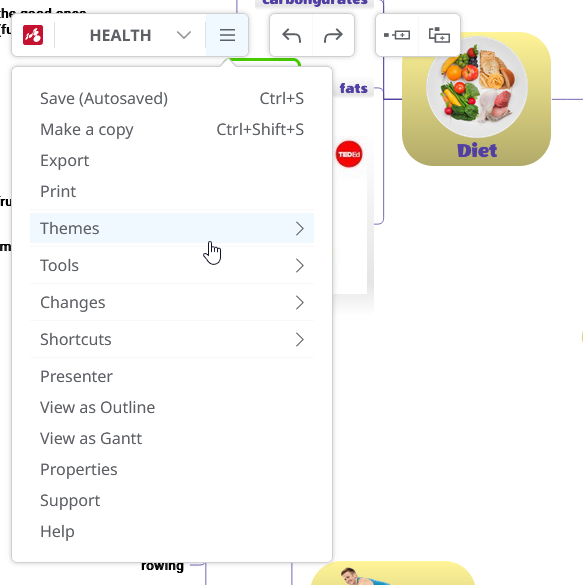
- Save - you can discover the "Autosave" function in the top toolbar. This function is enabled, and so you don't have to click "Save" every time you want to backup your piece of work.
- Make a copy - this function is as well attainable from the top toolbar past borer on the showtime icon. In society to make a copy of the map, you will be asked to proper noun the re-create and add other options. In one case the information is complete, click "Ok".
-
Export - you lot tin easily export the map on your figurer/Dropbox/OneDrive/Google Bulldoze in a variety of formats: PDF, RTF, PNG, listen map formats, Microsoft Excel formats, and other types of formats.
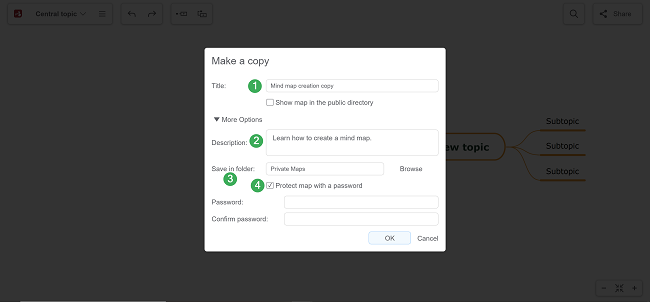
Make a re-create
This is the tab that appears when yous choose to brand a copy of a map. To save that copy, yous will take to follow these steps:
- Fill in the map's title.
- Add a description.
- Specify the target folder.
-
Choose if you want to protect your map with a password.
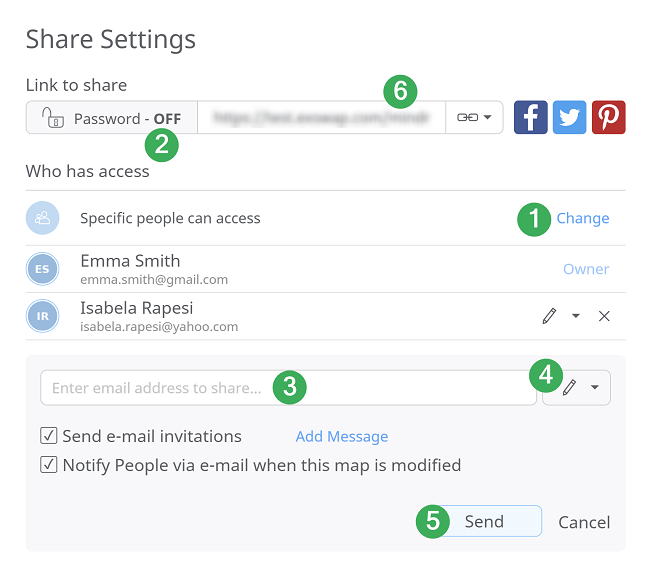
Sharing mind maps
- Past default, the map is private but you can change its settings to go far public.
- You tin choose to password-protect the map if you are a premium user.
- Share the map via e-mail.
- Set editing rights.
- Relieve changes and transport an invitation to collaborate.
-
You can also use the share link – information technology will be copied in your clipboard. When a user accesses this link, the map volition open in view mode if you fabricated information technology public or it will open in the editor if yous shared it with that specific user via email.
-
Y'all can also share your maps from the Dashboard.

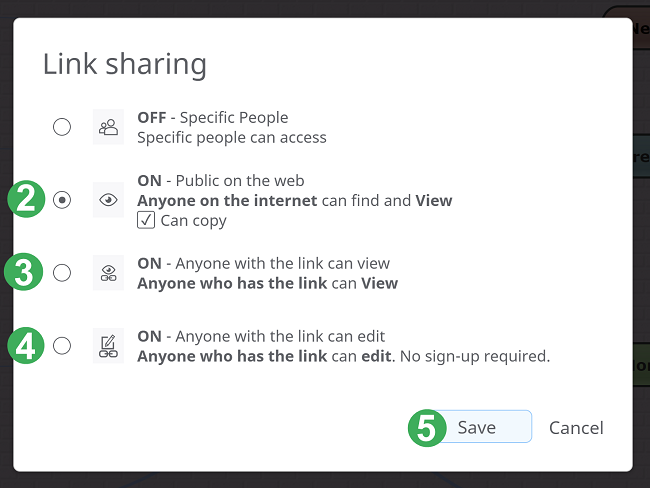
Publishing heed maps
- Change the map access from private to public.
- The mind map volition be public in the Mindomo Gallery so that anyone can view it.
- The listen map will be accessible for anyone who has the map link.
- Anyone who has the map link tin both view and edit the map using fully premium features.
- Click on 'Save'.
-
Use direct links to give view access over the heed map, embed it, view it equally RSS and HTML.
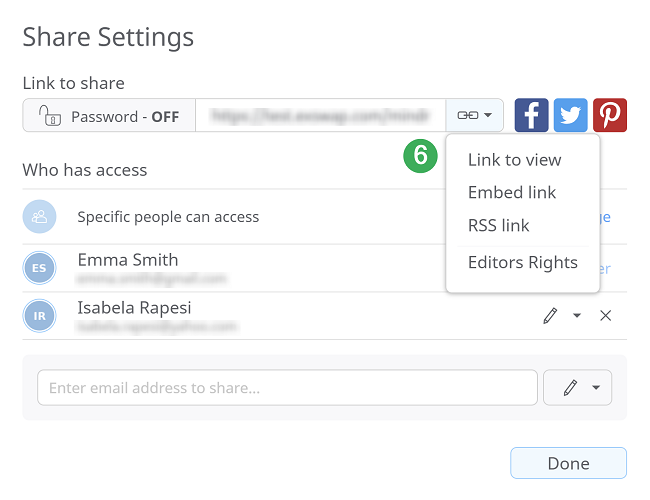
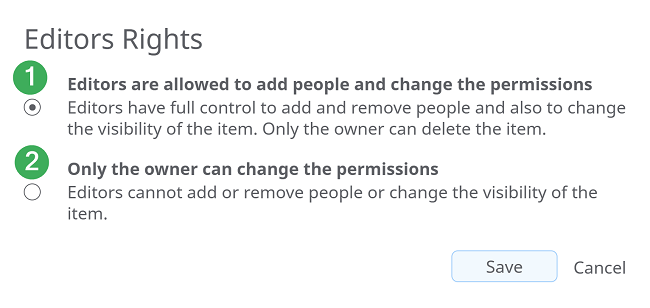
Editors Rights
- Editors are immune to add people and change the permissions.
-
Merely the possessor can change the permissions.
Styling listen maps
Formatting and Styling your Mind Maps
You tin change the look and style of your mind maps to help you organize or even present your data.
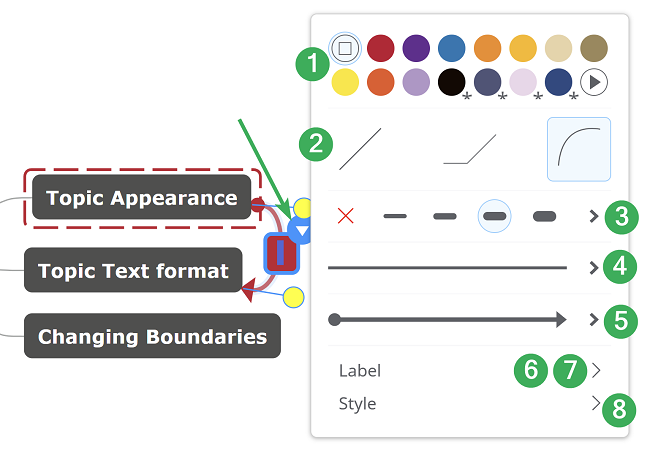
Topic Appearance
To beautify the topic appearance, click on the 2d icon from the context menu.
You lot accept the following options to format the topic:
- Background Colour - cull a background colour for your topic.
- Topic shape - change the shape of your topic.
- Topic paddings - change the size of the topic on which side you want, while the text remains the aforementioned size.
-
Topic stroke - change the stroke of the topic.
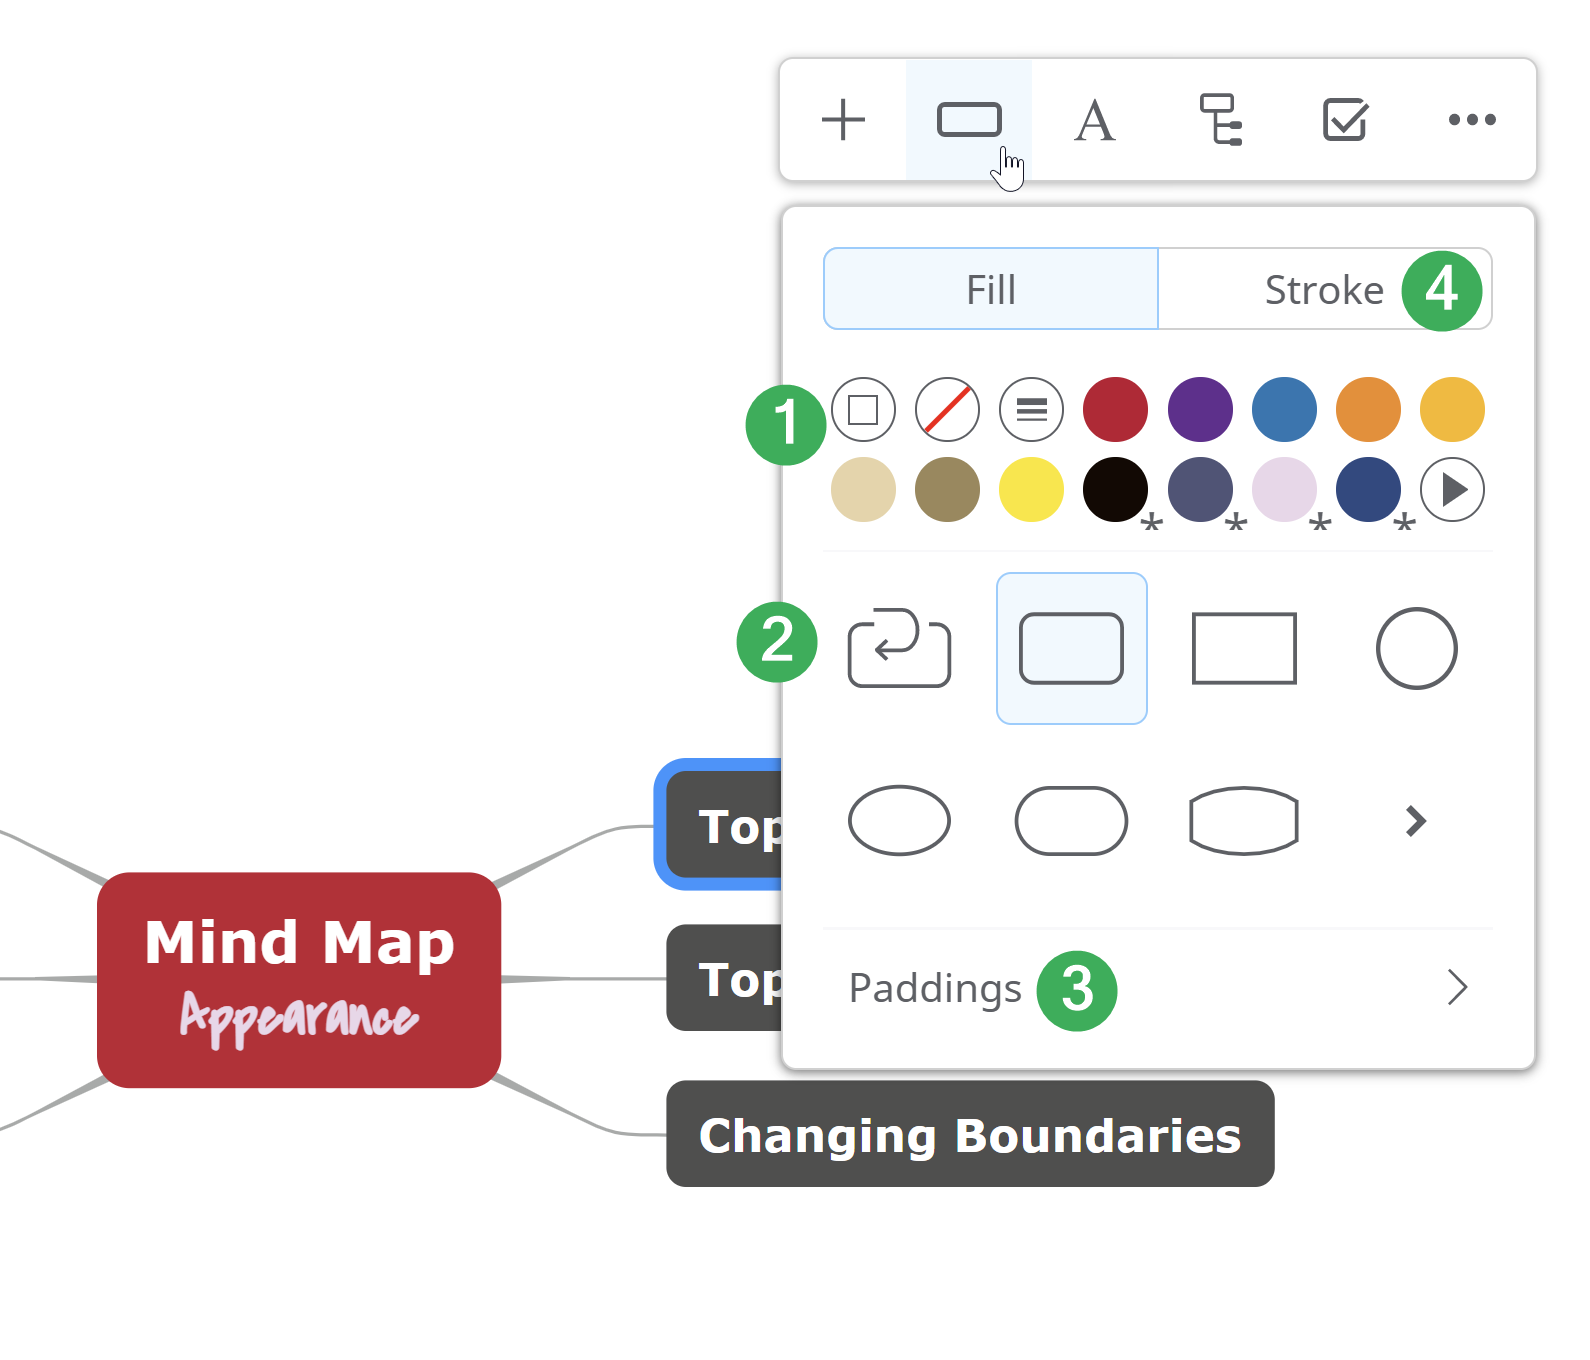
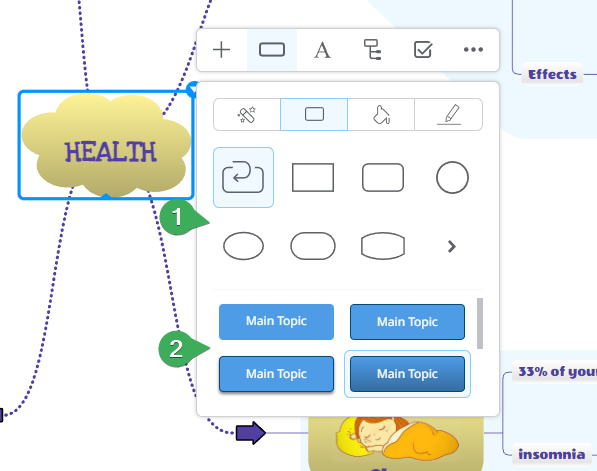
Topic shape
There are diverse shapes you can cull from. Some of them are:
- Default - taken from the map theme.
- Rounded - a rectangle with rounded corners.
- Square - a simple rectangle.
- Round - a circumvolve will be drawn.
- Circle - a circumvolve volition exist drawn.
- Line - a line below the topic.
-
Pointer - an arrow volition be drawn.
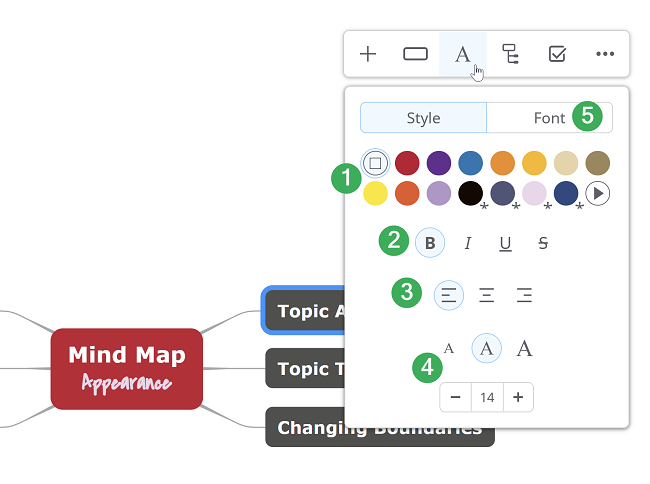
Topic Text format
You can format text by using the Font Menu.
- Font Color - choose text color.
- Bold, Italic, Underline, and Strikethrough - use these to format your text.
- Text Alignment - you can cull Left, Heart, and Correct.
- Font Size - change the size of your text.
-
Font Family unit - choose from various fonts.
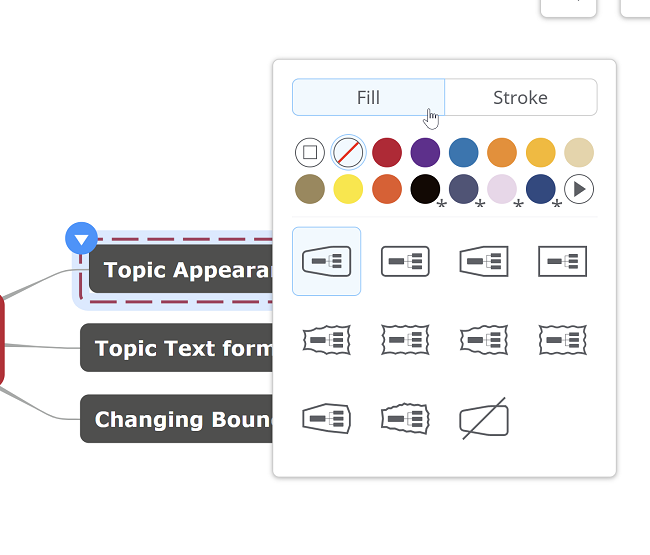
Boundaries
The boundary will help you mark and determine the limits of an expanse on your map.
- Change Boundary Style – y'all have x styles which you can apply to the boundaries in your map.
- Remove Boundary – remove the selected boundary.
-
Customize Boundary - it enables you to choose the boundary's color, line weight, and pattern.
Relationship Appearance
- Click on the "Relationship" icon to add a connexion between two topics.
-
To customize the human relationship's appearance, y'all will have to click on the human relationship and then on the context menu icon that appears on the relationship curve.

These features will be displayed:
- Color - choose a color for the selected relationship.
- Shape - choose the shape for your connexion.
- Weight - alter the thickness of the connection.
- Blueprint - choose 1 of the line styles for the connection.
- Arrows - select the direction.
- Edit - edit or delete the label, re-create the mode of the relationship
- Delete - select the relationship and delete it.
-
Ready as Default - set current styling as default
Map styles
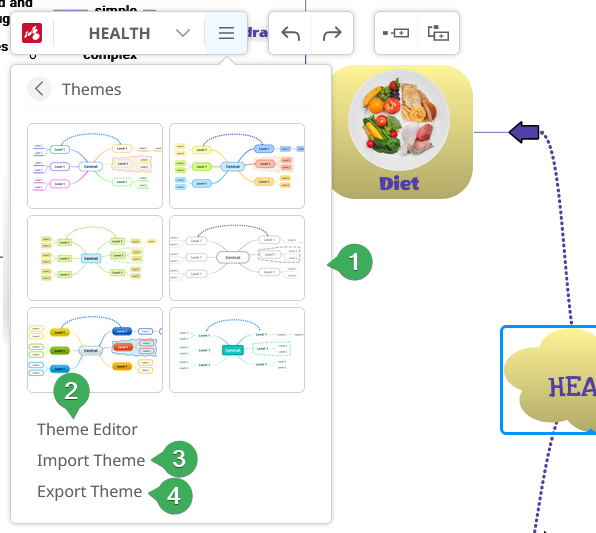
- Themes Style - cull the appearance of your electric current mind map from the predefined theme styles (1).
- Theme Editor - create your own personalized theme (2).
- Import Theme - import previously saved themes (3).
- Consign Theme - consign your themes (4).
-
Map Groundwork - correct-click on the canvas(5), and then click on Map Groundwork (6) and cull a color/pattern/moving-picture show.

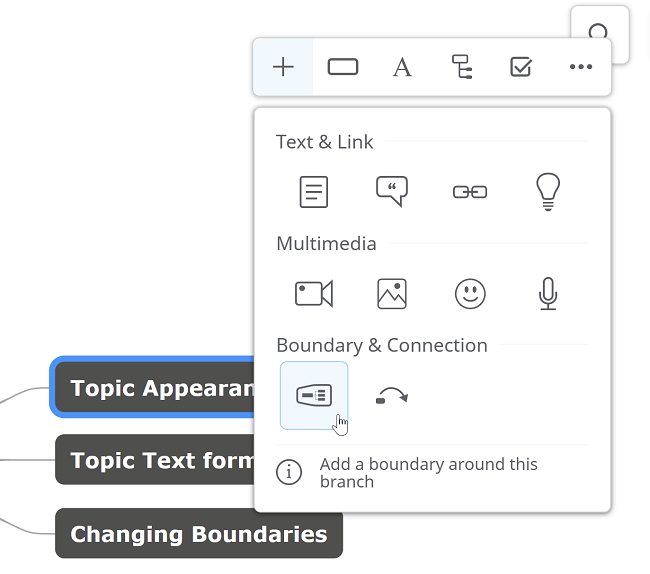
Calculation data to the topics
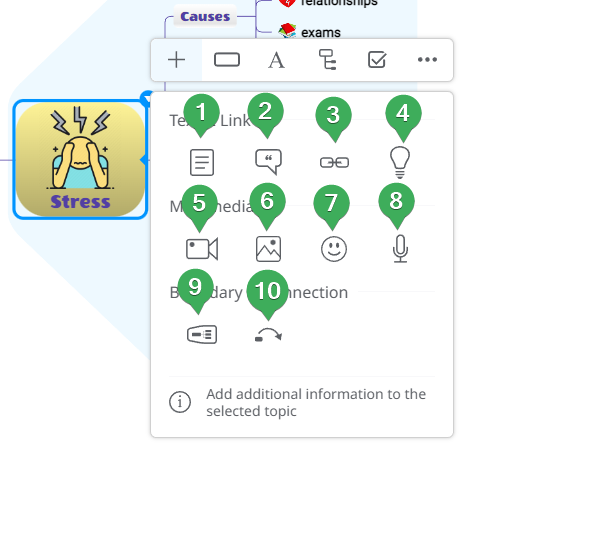
To add together Text and Links, Multimedia, Boundary & Connectedness, click on the commencement icon from the context menu. You will find the following options:
- Add notes
- Add comments
- Add hyperlinks and attachments
- Add bookmark as subtopic or link
- Add a video
- Add together an image
- Add an icon
- Add together sound files or tape your speech
- Highlight an surface area in the mind map
-
Insert a relationship between two topics
mitchellgrettests36.blogspot.com
Source: https://help.mindomo.com/
0 Response to "How to Save the Custom Color of a Note Created in Preview So You Can Use It Again"
Post a Comment